Motocross bikes
aren't really designed with the FMX rider in mind, so at times a
little modification is necessary in order to have a solid grab that
is firm and easy to get ahold of. Some bikes require more modifying
than others, and most will require you take at least one trip to the
welding shop.
I was recently
cutting up a 1999 Kawasaki KX250 to make it ready for FMX, and the
subframes on those bikes can be done several different ways, but on
this one I was playing with it and really trying to make the grabs
very sturdy, open, and fairly thin (to make the grab easier to get
ahold of ). I've had alot of experience with Kawasakis, and since the
99-02 subframes are all the same, I was confident in making this one
a little more complex.
For a project like
this you'll need someone who welds aluminum (Or a local fab shop that
will do it. Most muffler shops are happy to take walk in business to
weld aluminum). You'll also need some scrap pieces of square aluminum
tubing. Most metal supply shops will have bins filled with cut-offs
that they will sell for a few dollars a piece.
I started by
taking lots of measurements with the bike on the stand and still put
together. I wanted to plan out exactly how high my subframe would be
needed to come so that everything worked out right. I knew I wanted
the frame to travel just along the bottom of my seat from the center
point of the seat up to where it would need to meet the bar that
would attach it back to where I cut it off.
Because I wanted
the subframe to now travel along the bottom of the seat the plastic
spacers would have to be cut off (the O.E.M. design has plastic
spacers that are built into the bottom of the seat).
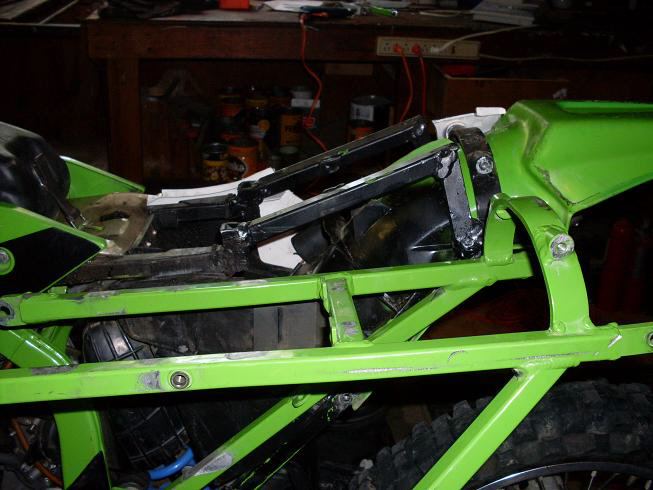
In the above image
you can see the final subframe (in the background of the picture) and
the O.E.M. subframe in the foreground. I wanted the subframe to
travel just under the seat, rising up with the seat untill just in
front of where the seat and side panels bolt to it. In hindsight, I
could have made this a little simpler had I opted to change the
angles a little, but this design worked out just fine.
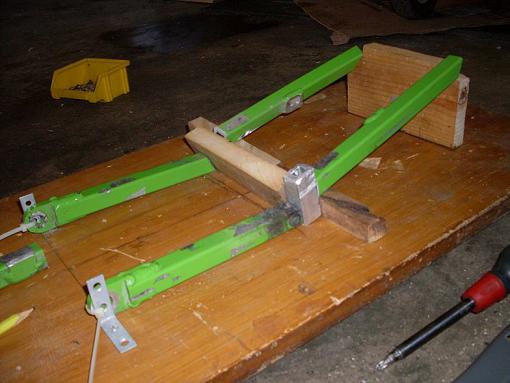
In order to save a
few trips to the welding/fab shop, I decided this would be easier if
I built a jig to line up all the pieces that would form the top of
the subframe. You can see where I cut the frame just behind where the
airbox bolts to it and added an exta piece to act as a spacer (piece
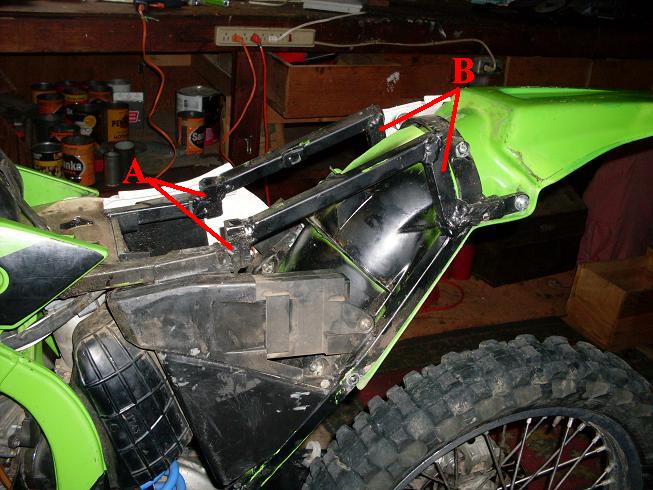
A below). Once these pieces were tacked together, I put everything on
the bike how it would end up so I would know exactly how to cut and
shape pieces B (see below). I then cut pieces B and went back to the
shop for the final two pieces to be tacked in. Once it was all tacked
togetther I put the plastic, airbox, and seat back on to ensure
everything lined up correctly. Once I verified that, I took it all
back off and left the subframe with the welder to finish the welds.
Because the rails
are bent inward toward the rear (in order to follow the angle of the
seat better), the cross piece (in the center of the two rails) had to
be cut out. For structural stability and overall strenth of the
frame, I added a new cross piece toward the front not far behind
where it bolts to the main frame.
All together this
project involved two trips to a welding shop (and about 3 hours of my
day) and cost about $70.